
What is a Personal Journey?
Until now, we’ve looked at different kinds of journeys like onboarding journeys, contextual journeys, and guided journeys. What is common among all these journeys is that they are all somehow linked with an action or HCM flows but a personal journey is independent of any kind of tasks or flows.
You create personal journeys to assign them to yourself or to any specific person or group of people you have access to through security profile. Another difference is that the various types of journeys we discussed earlier are created from the Checklist Template page, while a personal journey is created directly from the Journeys App, which we will see very shortly.
You can make use of personal journeys for different scenarios such as obtaining a vaccination certificate, returning to work, etc. In this article, we will configure a journey for a Weekend Outing and see how it is used to streamline the outing planning process for an HR manager who has been tasked with organizing a ‘Weekend Outing’ for her organization.
To properly organize the event, the HR manager has to share the event’s location with all individuals; she also needs to obtain no-objection certificates from their managers. Finally, she has to book tickets for everyone who has received a no-objection email from their manager. We will explore how this is accomplished using personal journeys.
How to Enable Personal Journey?
There is no specific profile that you need to enable for personal journeys but ensure that journeys feature it-self is enabled through profile option ORA_PER_JOURNEYS_ENABLED. If it is not already, follow below navigation.
- Search for the task Manage Administrator Profile Values.
- Search for the profile option code : ORA_PER_JOURNEYS_ENABLED
- Change profile option value to Y
- Click on Save and Close button.
Log out and log back in to ensure that profile values take effect.
Steps to Configure Personal Journey
There are different ways you can create a personal journey. You can either explore existing journeys and copy one to create your own version by making updates, or you can start a new journey from scratch. In this article, we will cover both approaches, but we’ll begin by looking at how to create a completely new personal journey.
Navigation : My Client Groups (or My Team) » Journeys » Explore tab
1. Create Personal Journeys From Scratch
To create a personal journey login as a line manager or HR Specialist and navigate to Journeys app and click on Explore tab.
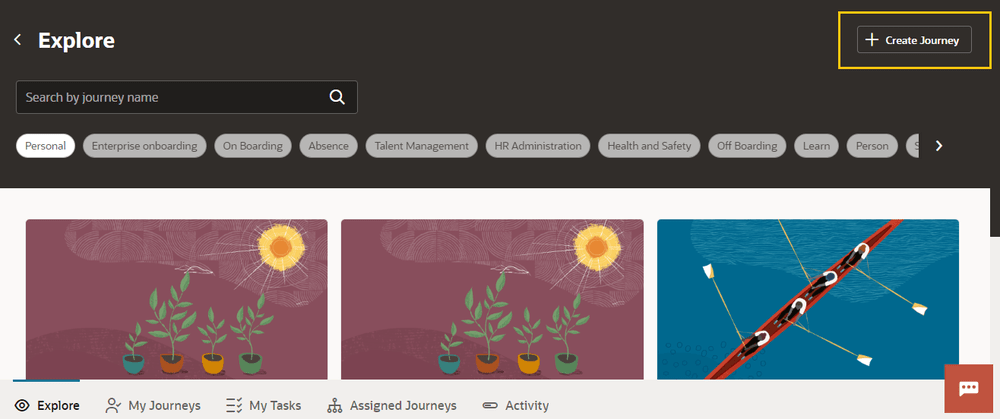
On the top right corner you see a button Create Journey. Click on that to begin your process of creating a personal journey. You are on New Journey page. This page defaults you to start creating your personal journey based on any existing journeys therefore you see a big tile that reads Select existing journey.
As our intention is something else and we are determined to create one from scratch, click on the hyperlink Create a journey which is available next to text Not what you’re looking for?
Once you click on that hyper link, header text changes to What’s this journey about? from Select existing journey. Now on this page enter details as follows
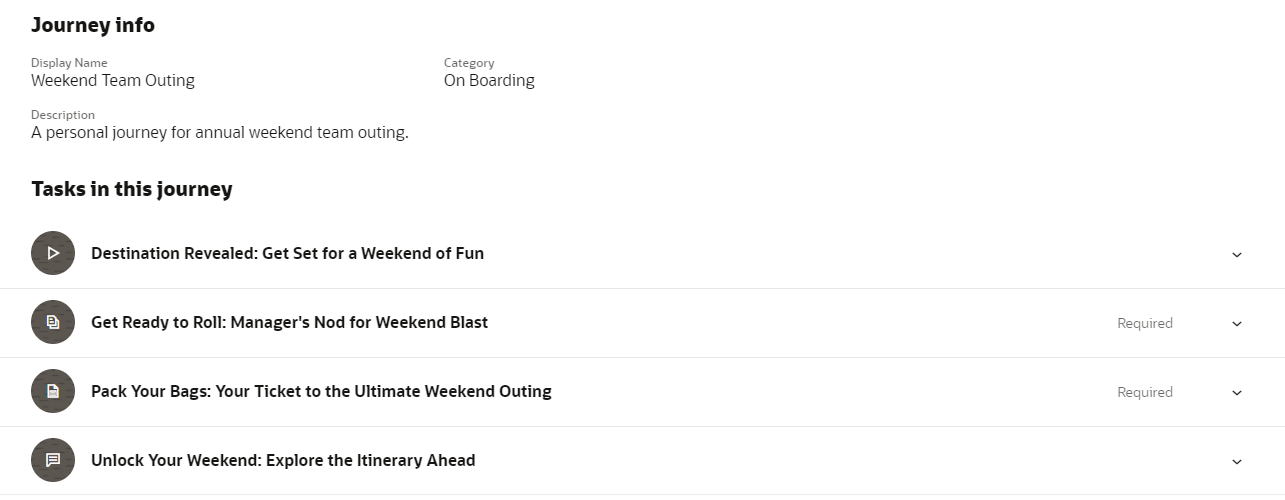
- Display Name : Weekend Team Outing
- Category : On Boarding
- Description : A personal journey for annual weekend team outing.
- Add a journey title : Weekend Team Outing for Employee
1.1 Add Background image for the journey
Once you enter details mentioned above, scroll below to Background image for this journey section. Click on the + Add button and upload an image.
1.2 Create tasks for the journey
Scroll below further to Tasks in this journey section. Click on the + Add Task button. This will open a new page Weekend Team Outing : New Task
This page is again defaulted to add tasks from the task library, but we need to create a task from scratch so click on hyper link Create a Task which is available next to text Can’t find what you’re looking for?
1.2.1 Create first task : Reveal destination
First task in this personal journey is about revealing outing destination. HR manager has curated an exciting video to share with everyone, which has teaser and the location of the destination, so she decides to create a video task as follows for the journey
- Task Name : Destination Revealed: Get Set for a Weekend of Fun
- Performer : Worker
- Owner : Initiator
- Duration : 7
- Time Unit : Days
- Task Type : Video
- Task Subtype : Media URL
- Task URL : https://youtu.be/oUNh1F5padg
- Task Description : Task to reveal destination
- Add instructions for this task : We’re thrilled to announce that the long-awaited annual weekend team outing is back for this year, and it’s going to be bigger and better than ever before. Dive into the excitement by watching the video to get a sneak peek of your upcoming weekend home!
- Save to my personal task library : Yes
Scroll up and click on Add button to complete first task configuration.
1.2.2 Create second task : Get managers approval
While Weekend Team Outing journey page is still open, scroll down to Tasks in this journey section again and click on Add Task button, to create a task from scratch click on hyper link Create a Task and enter details as follows
- Task Name : Get Ready to Roll: Manager’s Nod for Weekend Blast
- Performer : Worker
- Owner : Initiator
- Duration : 10
- Time Unit : Days
- Task Type : Document
- Drag and Drop : upload a document which employees can use to get their managers approval.
- Task Description : Get manager approval for weekend fun
- Add instructions for this task : Before we dive into the fun, we’d love to have a quick thumbs-up from your manager, just a nod to let us know you’re all set to rock the weekend with us. Drop your manager a line and let them know you’re excited to join the adventure. Once you get the green light, upload their approval email. You may also use the attached form instead of an email.
- Save to my personal task library : Yes
- Make this task mandatory : Yes
- Enable Attachment : Yes
- Add attachments to document records : Once you enable attachment, you also get option to upload and store documents in the Document Of Record section. For this exercise we are not storing it so leave it blank.
Scroll up and click on Add button to complete task configuration.
1.2.3 Create third task : Book a Ticket
While Weekend Team Outing journey page is still open, scroll down to Tasks in this journey section again and click on Add Task button, to create a task from scratch click on hyper link Create a Task and enter details as follows
- Task Name : Pack Your Bags: Your Ticket to the Ultimate Weekend Outing
- Performer : Worker
- Owner : Initiator
- Duration : 10
- Time Unit : Days
- Task Type : External URL
- Task URL : https://askpuzzle.com/
- Task Description : Book a ticket
- Add instructions for this task :The countdown to our epic weekend getaway is on, and we’ve got some exciting news to share – it’s time to secure your ticket to a weekend of pure fun!Booking your spot is a breeze. Just follow these simple steps:
- Visit the Booking Portal: Head over and click on Go to Website link
- Use Your Coupon Code: To sweeten the deal, we’ve got a special coupon code just for you. Enter code: HCMFOLKS2023 during checkout to get a fantastic 100% discount on your ticket.
- Get Ready to Party: Once you’re booked, you’re officially in for an unforgettable adventure! Remember to pack your excitement and a dash of adventure spirit.
- Save to my personal task library : Yes
- Make this task mandatory : Yes
- Enable Comments : Yes
Scroll up and click on Add button to complete task configuration. With this we have completed all three tasks. Create one more task of type Manual, which will have description about the itinerary, give this task name “Unlock Your Weekend: Explore the itinerary Ahead“
Once done scroll up and click on Save button. With this you have completed your Personal Journeys configuration.
2. Create Personal Journeys from Existing Journey
We have explored a way to create a personal journey from scratch, lets quickly explore how we can create one by just duplicating an existing journey. Think about a scenario when same HR manager needs to configure another personal journey for another event. Rather than creating everything again from the scratch she can just copy the existing one and modify it as per the need.
- Click on the Explore tab again
- Click on Create Journey button
- In the Journey Name filed search and select Weekend Team Outing, which will copy all details.
- Change the name in Display Name field from “Duplicate of Weekend Team Outing” to “Friday Movie Magic“
- Scroll down to Task in this journey section and delete task “Unlock Your Weekend: Explore the itinerary Ahead” by clicking on delete icon against this task name. Task gets delete without any warning, this is scary!!
- Click on the Edit Task icon for task “Pack Your Bags: Your Ticket to the Ultimate Weekend Outing”
- Change the Task URL to : https://iavinash.com/
- You may change task name, description or anything else as per need.
- Click on Save button
- Scroll below to Background image for this journey section and change the photo.
- Scroll up and click on Save button.
With this you have created a new personal journey Friday Movie Magic, which is based on Weekend Team Outing.
3. Modify Personal Journeys
We will explore what we can do with a personal journey. Click on the Explore tab and search for journey we just copied Friday Movie Magic and click on it to open it.
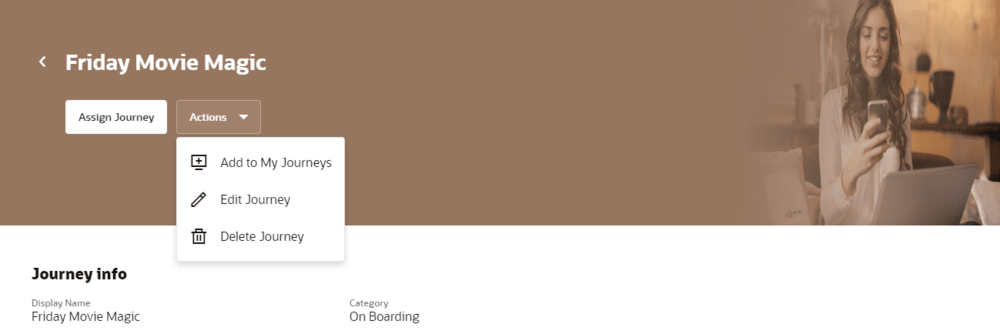
Click on the Action button and you will see following three options
- Add to My Journeys : This will add journeys to yourself
- Edit Journeys : This will allow you to edit journey further.
- Delete Journeys : Using this you can delete the journey. This option is available when when this journey is created by yourself. You cant delete a personal journey created by others (unless you have required access to do so)
You can assign journey to your self even by clicking on that Assign Journey button.
3.1 Delete Personal Journeys
As this journey is created by yourself, you can destroy it by clicking Delete button. I understand it’s painful, but click on the Action button and select option Delete Journey.
You will get a confirmation message Delete Friday Movie Magic journey?, click on Delete button to proceed.
Assign Personal Journey
Next we can explore how do we assign personal journey that we have created. Click on the Explore tab again and search for the journey Weekend Team Outing. Click on it to open it.
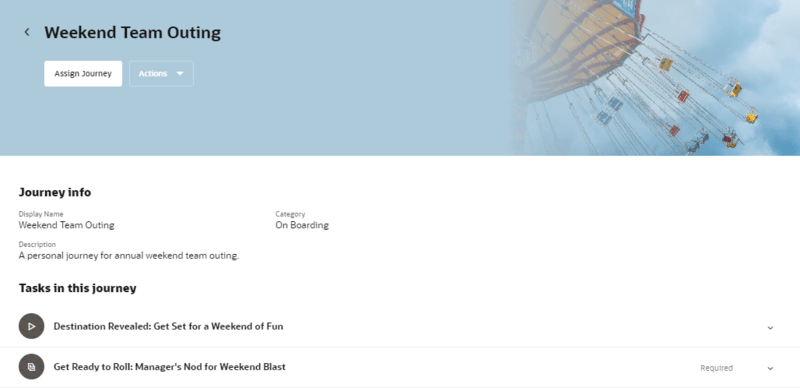
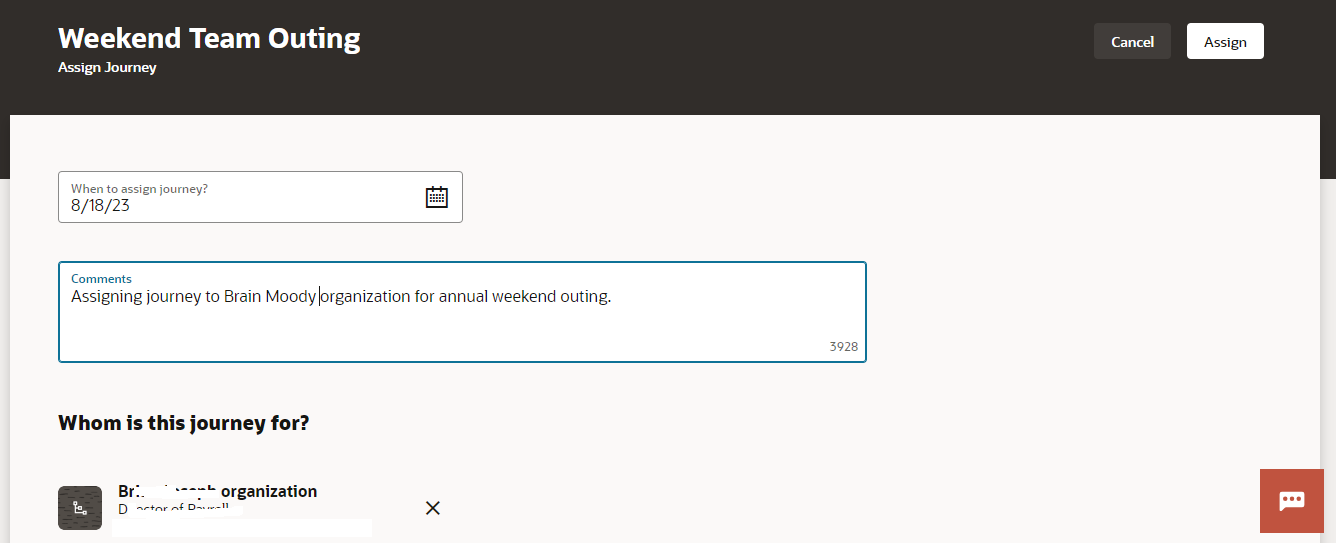
Click on Assign Journeys button, which will take you to Weekend Team Outing : Assign Journey Page. On this page enter details as follows
- When to assign journeys? : <Enter Todays Date>
- Comment : Assigning journey to Brain Moody organization for annual weekend outing.
Under Whom is this journey for? section, enter details as follows
- Selection Type : Organization
- Select a Person : <select a line manager or CEO >
If you wish, you can click on Add Assignee once again and enter another organization.
Once done scroll up and click on Assign button. As soon as you click on the Assign button application will take you to Activity tab. Here system runs process and allocated personal journeys to all eligible employees within the organization we selected.
Initially process might show in Pending status, but click on the Refresh button available at the top of the page. If you see a large message We couldn’t find any matches. Try searching or use another filter, which means process has completed.
Click on the Completed tile below search filed to locate your process. Click on the process name to see the status of all selected employees.
You can pick one name from the list and login as that employee to complete Journeys task we configured. You can follow this article to see how do we complete journeys task » Learn Everything About Oracle Journeys Step by Step
Questions on Personal Journeys
Hope you have followed steps mentioned in this article step by step to successfully configure personal journeys in your pod. If you are facing any issue or have any questions, please ask your question now.
- You can learn about contextual journeys here » Learn To Configure And Use Oracle Contextual Journeys
- You can learn about guided journeys here » Learn To Configure And Use Oracle Guided Journeys
- You can learn about onboarding journeys here » Learn Everything About Oracle Journeys Step by Step